Widget
Below you will learn how to activate a Widget-type channel and how to install the related code in an external platform or application you own (e.g., your website), in order to allow, in a very easy way, the creation of tickets or requests viewable in Desktale (input phase).
If you decide to activate a Widget channel for gathering tickets or messages from your customers or stakeholders, it is advisable that you also activate an email for sending messages (output phase), in order to be able to respond directly from within your Desktale interface.
First, click on to access the Setting section; then, clicking on Channels your channel list (which will initially be empty) will appear.
Create
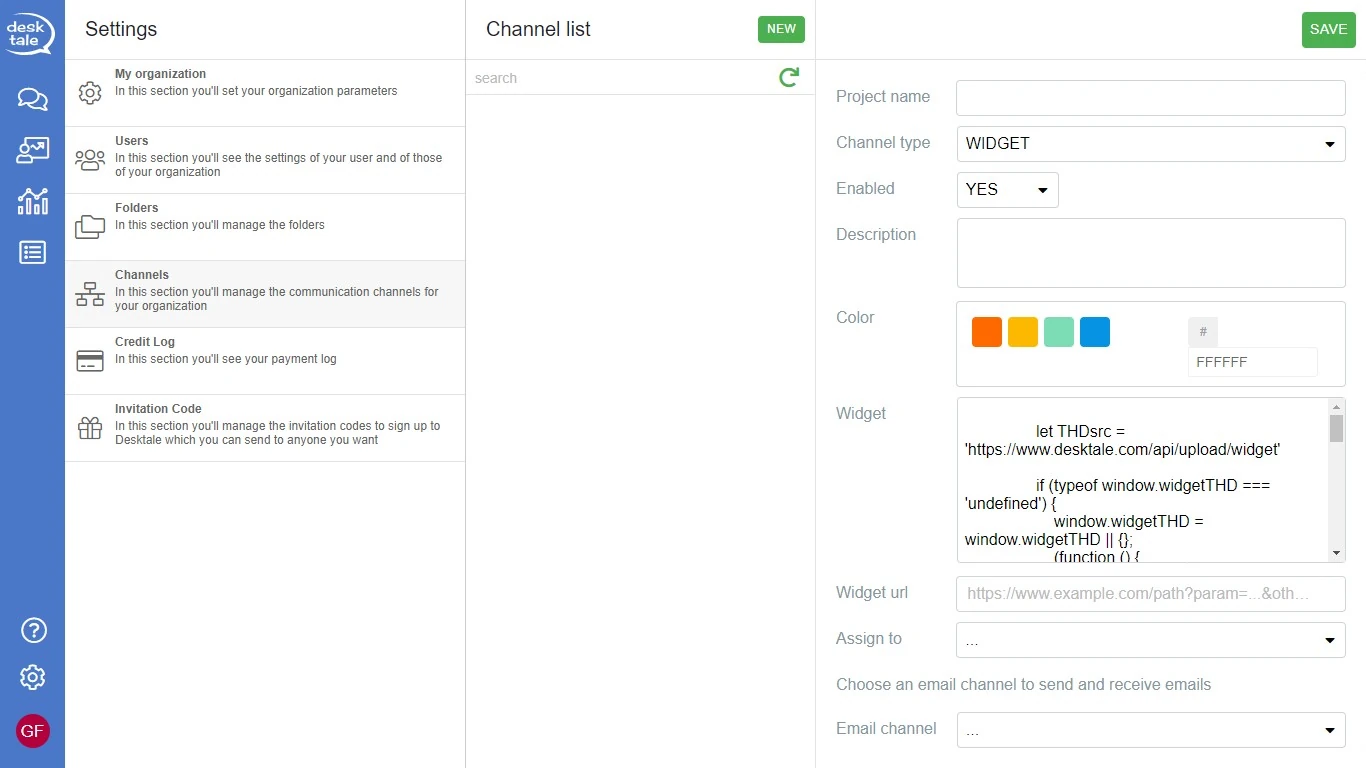
To create a channel of Widget type, first set the Channel type field to Widget to access the following settings.

More fields will appear for you to fill in:
- Widget: within this field you will find the code to enter in your html page to make our Desktale widget appear;
- Widget url: https address that we might link to in order to allow you to view -for example- the date of the client writing from widget or sending messages via API;
- Assign to: you can decide whether tickets from your customers or stakeholders should go directly to a particular user, or to a specific folder;
- Email Channel: specify the email channel through which sending replies via Desktale (output stage).
Save
When the configuration is completed, click SAVE to confirm the data entered.
To view the newly created channel, click on .
Delete
To delete the channel, select it in the Channel list, then, click DELETE to delete it.